
Hello Crochet Friends!
It’s Cyndi! Like many of you know already, I am finding out for myself that handmade crocheted items are wonderful gifts!
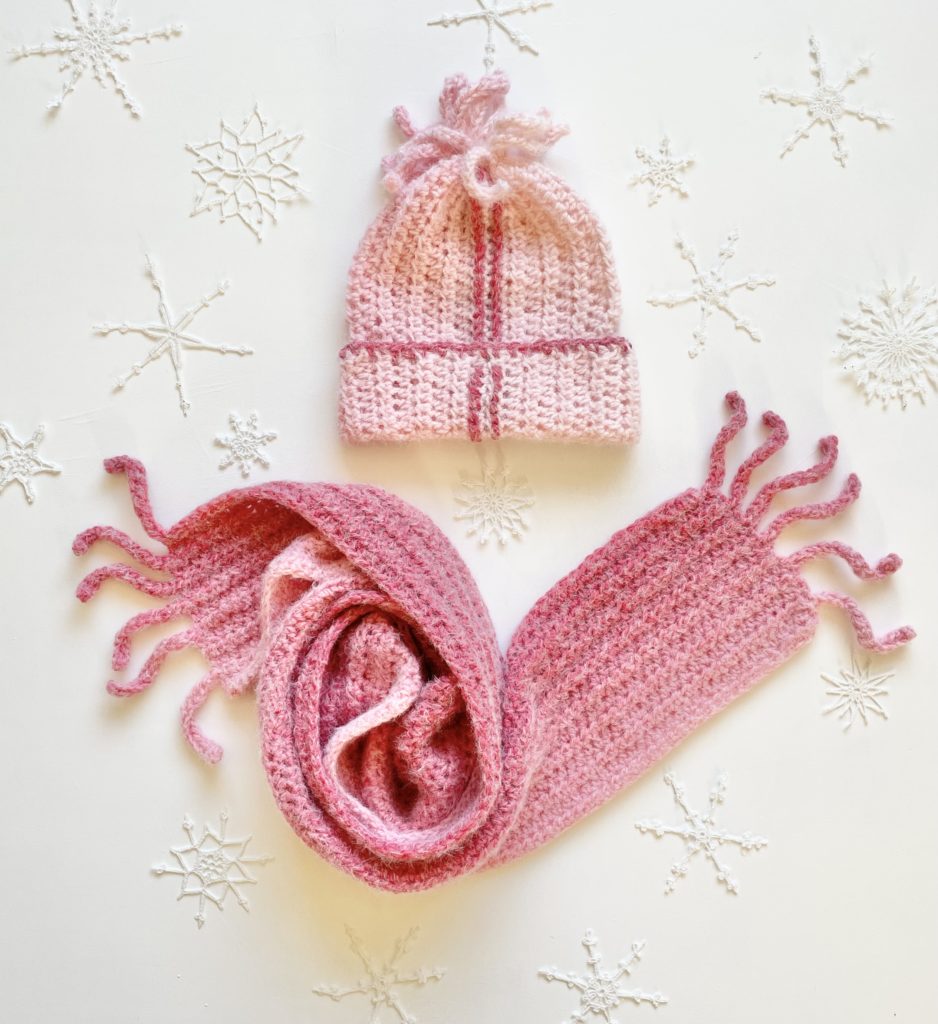
And this all-in-one Fun Fringe Hat and Scarf set is a fun and beginner-friendly project and perfect for gifting!
Tiff and I come from a family of six children and between the six brothers and sisters we have produced 30 grandchildren!
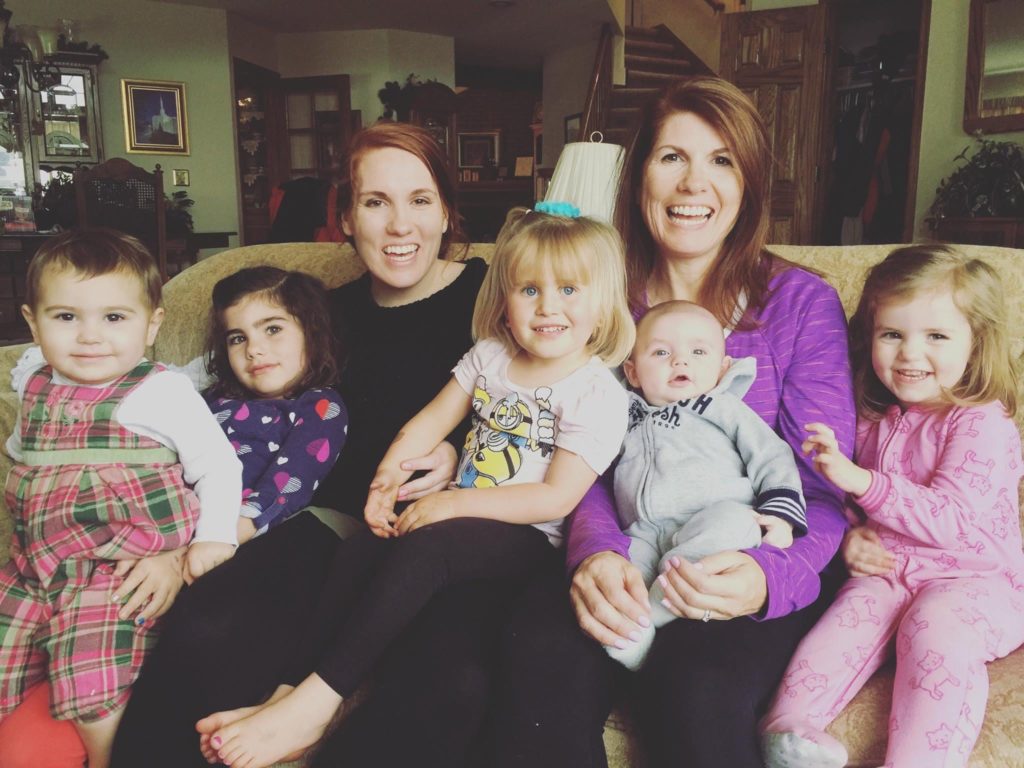
And now with Tiff’s new little grandbabies, there are now four great-grandchildren added to our clan!
Since we have been so abundantly blessed with children in our family there are plenty of opportunities to make fun things for the nieces and nephews.
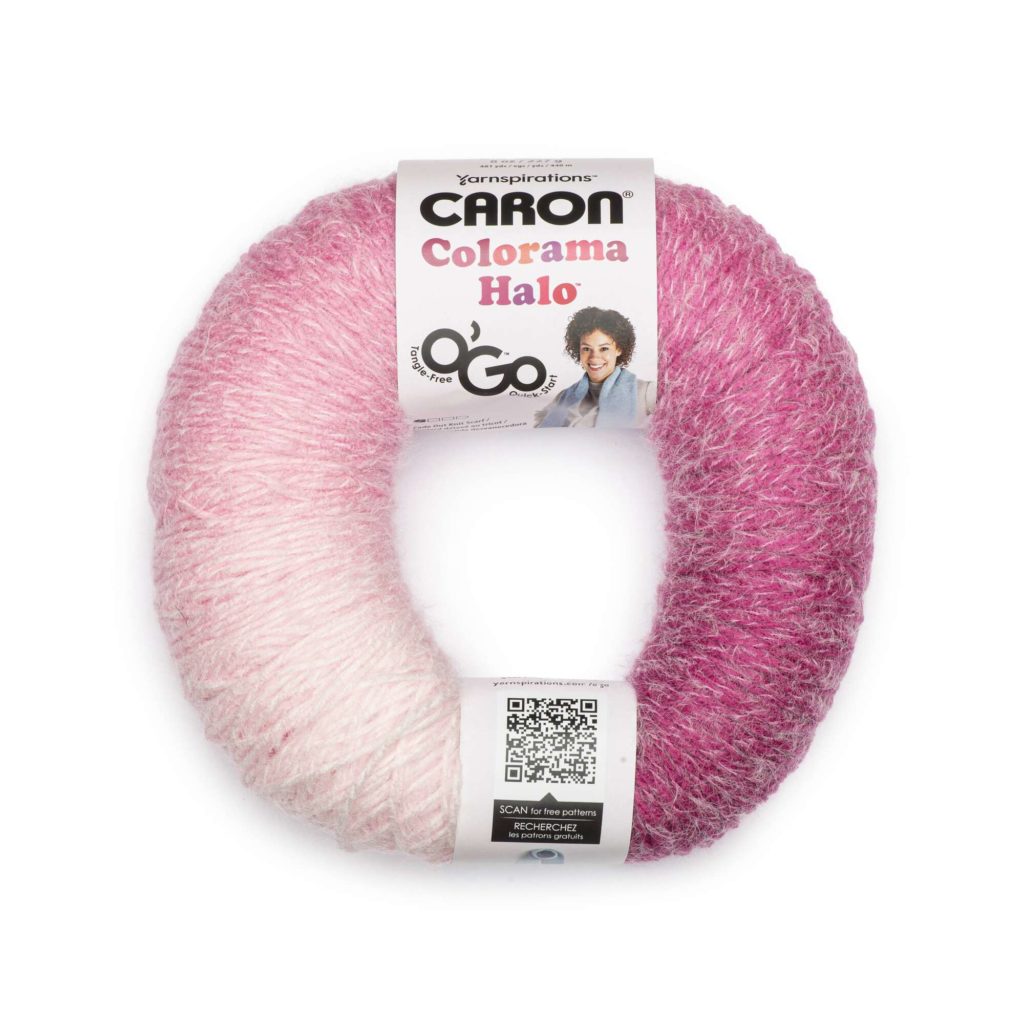
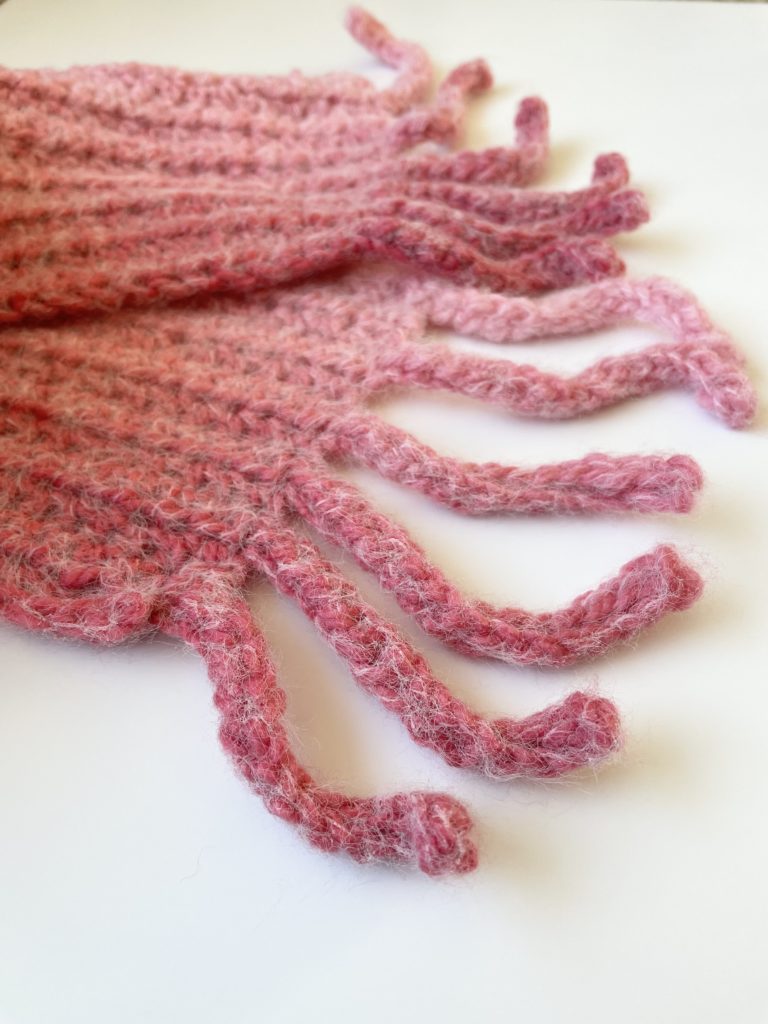
This pink fuzzy scarf and hat I made with my 9-year-old niece in mind. I made both the hat and six-foot scarf with just one round of the Caron Colorama Halo Ogo yarn.
I had enough left over to do an embroidered detail just for fun! Both are beautiful and affordable gifts for the special people on your gift list.
Materials
- Content: 71% Acrylic, 18% Nylon, 11% Polyester
- Ball Size: 227 g/8 oz, 440 m/ 481 yds
- Gauge: 5- Bulky
1 o’go Rose Frost (or any color, they are all beautiful!)
Size I, 5.5 mm hook, scissors, tapestry needle, measuring tape
Stitches
Half Double Crochet (HDC) : – YO, insert your hook into back loop, YO, pull up a loop, YO and pull directly through three loops on hook.
Half Double Crochet Slip Stitch (HDSS) : –YO, insert your hook into back loop, YO, pull up a loop and pull directly through two loops on hook.
Single Crochet : Insert your hook, YO and pull up a loop, YO and pull through two loops on hook.
Patterns
Hat Pattern
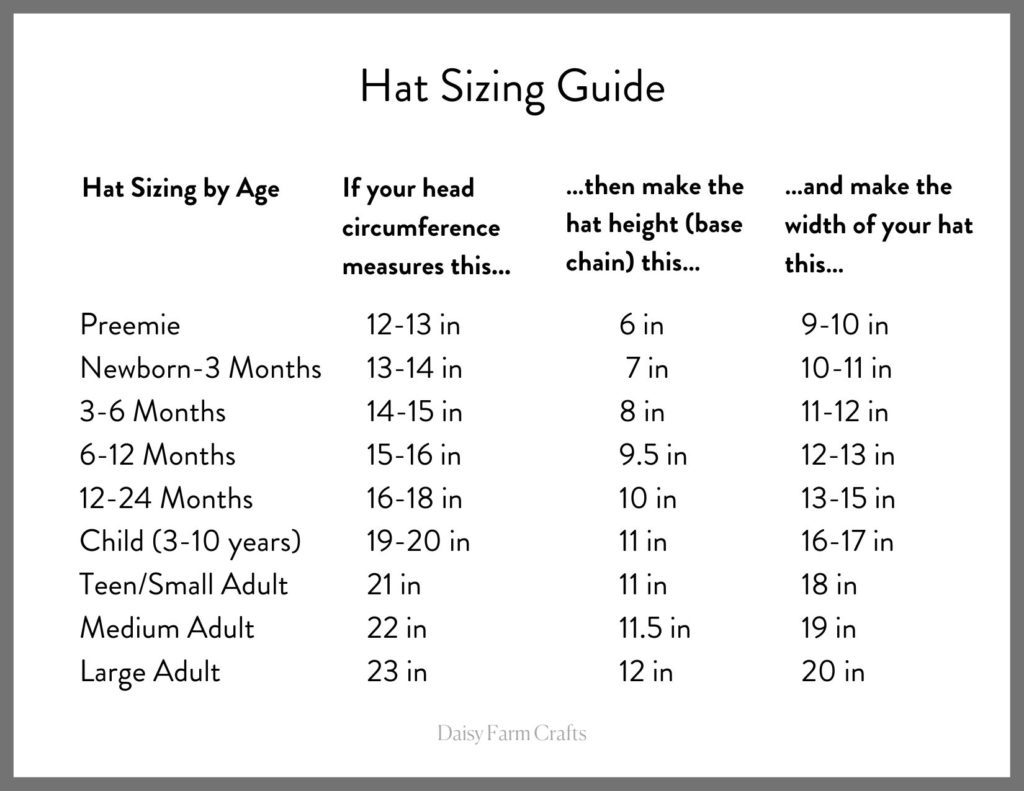
HOW TO DETERMINE HAT SIZE:
The best way to ensure your hat fits is to make your base chain the same length as the tip of your nose to the crown of your head. You are making this hat lengthwise, so the length of your base chain will be your hat height. You can also use the chart below for some standard head sizes to measure your chain.
Chain 42. (Or number you need for size)
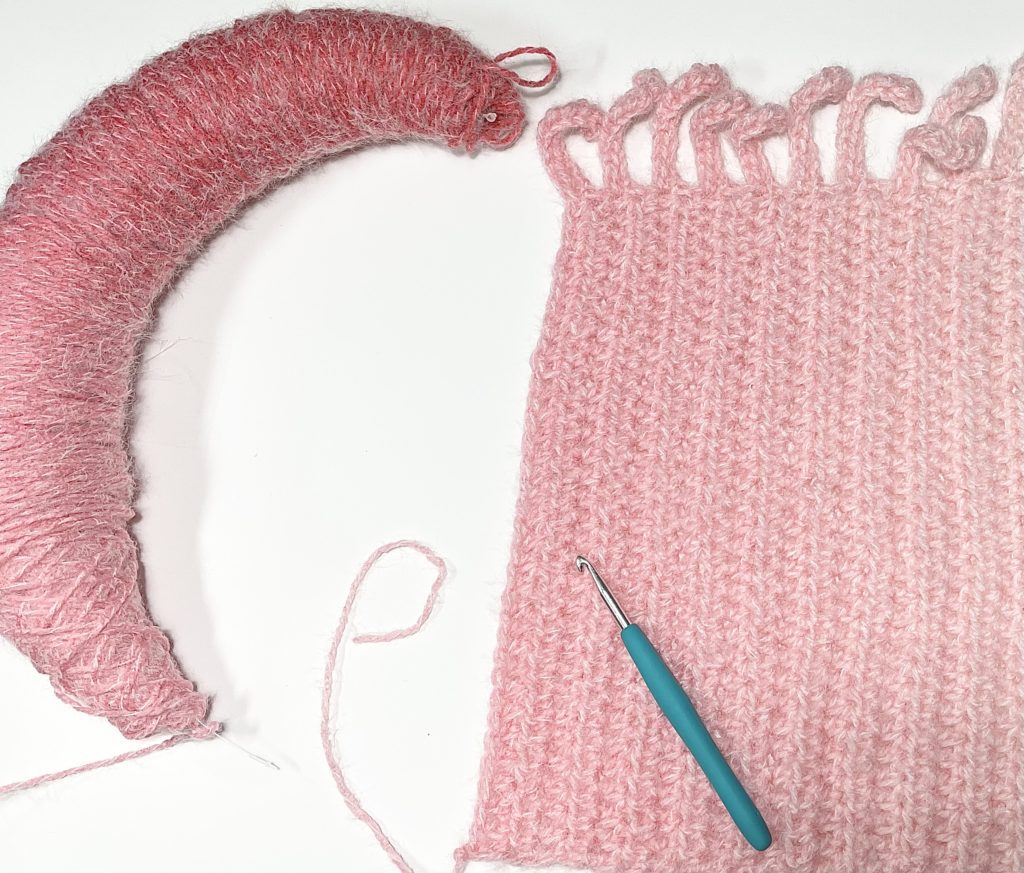
ROW 1: Starting in the 2nd chain from hook, work 1 HDC. Work 1 HDC into each of the next 39 chains across. Single Crochet (SC) into each of the remaining 2 chains. Chain 13 (for fringe) and turn.
ROW 2: Begin in the second chain from the hook, work 1 Half Double Crochet Slip Stitch (HDSS) into each of the next 12 sts. SC in each of the next 2 SC. HDC in each of the next 39 sts. CH 1 and turn.
ROW 3: HDC into each of the next 39 sts. SC into each of the next 2 sts. CH 1 and turn.
ROW 4: SC into each of the next 2 sts, HDC into each HDC. CH 1 and turn.
ROW 5: Work 1 HDC into each HDC. Work 1 SC into of the next 2 SC. Chain 13 and turn.
Repeat ROWS 2 through 5 until you have the width you need for size. (Make the hat 3 inches less than the circumference of the head. For example, a 22-inch head, make the hat 19 inches wide.)
Make one last Row 4 instruction to tie off at the bottom of the hat.
Tie off and leave a really long tail (probably about 15 to 20 inches). Fold hat lengthwise.
I tied off and left myself a really long tail (probably about 15 to 20 inches). I used the tail and a tapestry needle to sew the two sides of the rectangle together. When I finished sewing the sides together, I used the rest of the tail and my tapestry needle to weave in and out around the top of the hat, pulling it tight as I gathered it together.
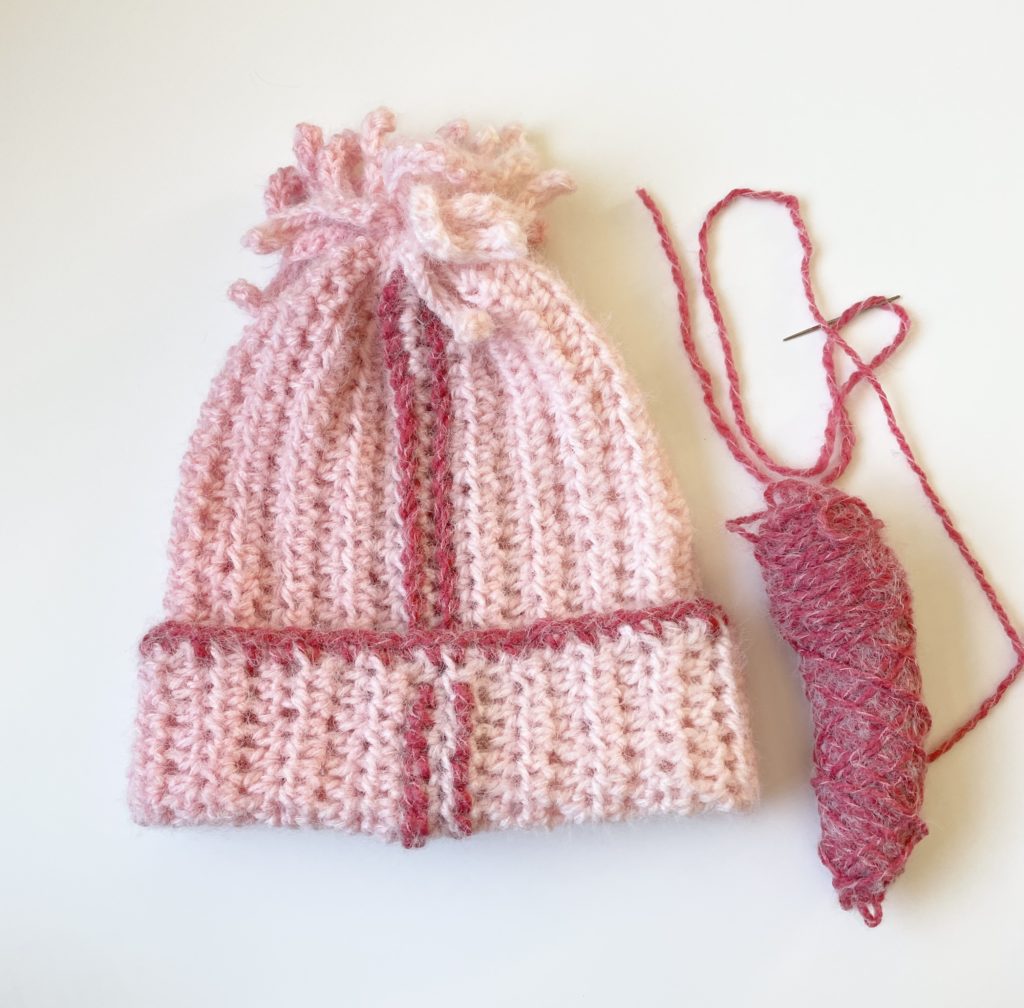
Optional Details: Back Stitch Embroidery
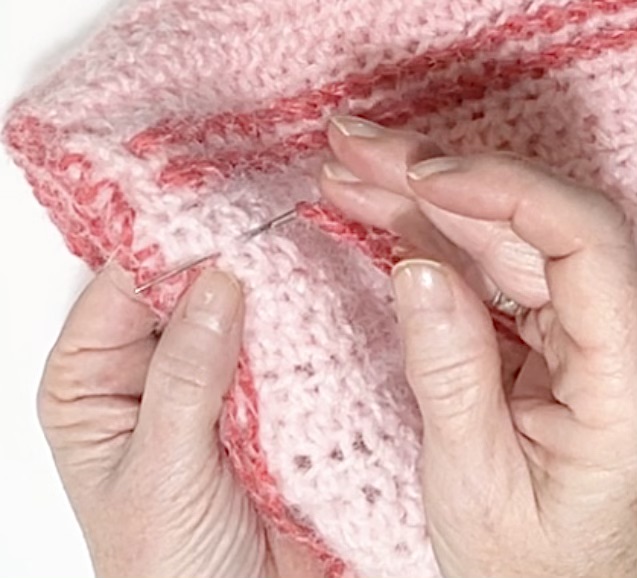
Using the leftover yarn and using the finished hat as your guide, measure out seven hat lengths of yarn for each row of stitching you plan to do. Cut and double by folding in half and thread the tapestry needle. Starting on the inside of the hat thread through the first space leaving a tail to weave in later.
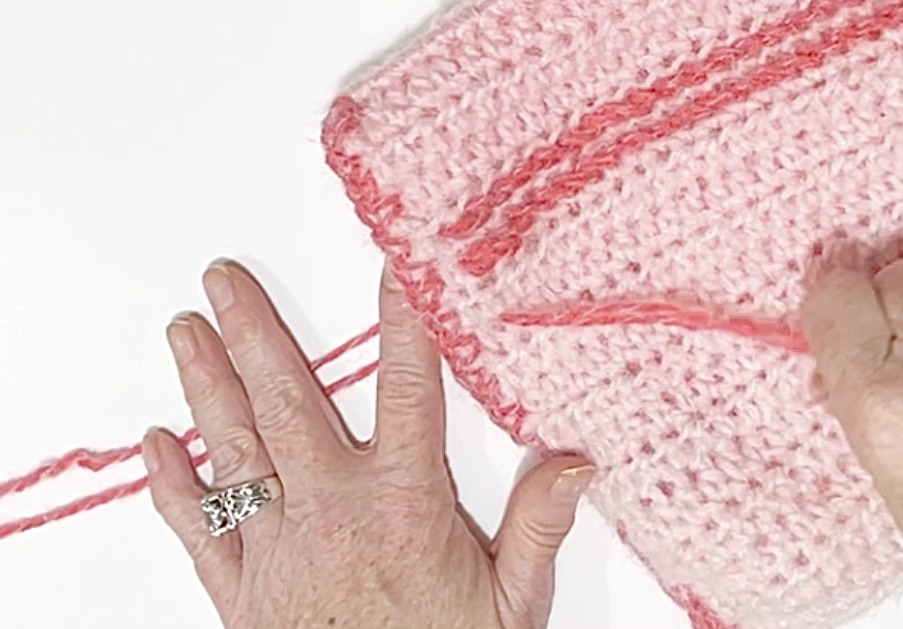
The stitching is completed by working in the spaces between the yarn, much like a needlepoint canvas. Work the stitches back into the previous space on each stitch following the spaces in a straight line to the top of the hat. Leave a tail for weaving and clip. Repeat for as many rows as you would like.
The last detail I added was a row of single crochet on the bottom edge. I made a quick video demonstrating how I did the backstitch along with a few other tips on my YouTube channel, Sugar Joye if you are interested!
Scarf Pattern
Size
Finished size 72 in x 7 in
Chain 180 (or number needed for approximately 6 feet.)
ROW 1: Starting in the 2nd chain from hook, work 1 HDC. Work 1 HDC into 177 chains across. Single Crochet (SC) into the remaining 2 chains. Chain (CH) 13 (for fringe) and turn.
ROW 2: Begin in the second chain from the hook, work 1 Half Double Crochet Slip Stitch (HDSS) into each of the next 12 sts. SC into each SC. HDC into each of the next 177. CH 13 turn.
ROW 3: Begin in the second chain from the hook, work 1 HDSS into each of the next 12 sts. HDC into each of the next 177 sts. SC into each SC. CH 1 and turn.
ROW 4: SC into each of the next 2 SC , HDC into each HDC. CH 1 and turn.
ROW 5: Work 1 HDC into each HDC. Work 1 SC into of next 2 SC. CH 13 and turn.
Repeat Rows 2 through 4 until scarf is width desired.
Tie off by pulling last loop through and weave in the ends. And your scarf is finished!
I hope you enjoy this pattern! It sure has been so fun for me to see how many of you made the original Fun Fringe Hat I made.

So many variations already in the Daisy Farm Crafters Group have been so pretty! And then Tiff already made one for the gorgeous Kate Tiffany, my brand new great-niece.

We are having too much fun! We even talked about this scarf on our Crochet Sister Chat we are doing once a week. Come and see the version in gray I did.
Thanks everyone!
Click here or image below for a free pdf download of the pattern.
![]()
